Showing posts with label cake making. Show all posts
Showing posts with label cake making. Show all posts
Tuesday, May 8, 2012
cakes
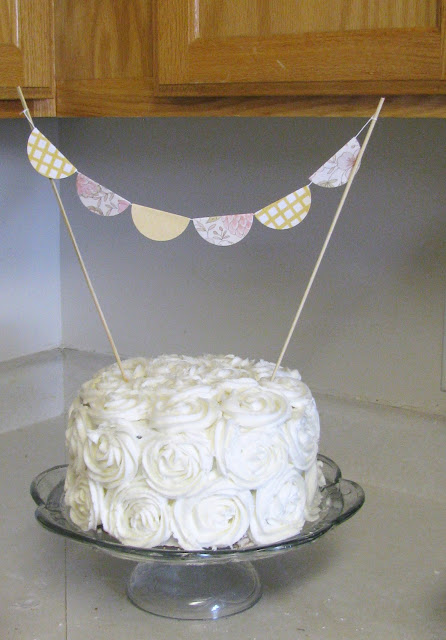
I've got 3 cakes and 2 sets of cup cakes to make in the next couple weeks. Cake is on my mind. This white cake was surprisingly easy (besides the enormous amounts of frosting it required.) But it packs a punch. I found the how-to on I am baker. Find it here. And yes, hers is much better than mine, but I'm learning.
My first attempts at cake making were at best pretty sad. Here's the buddies first birthday cake. . . good thing he was only one and didn't know how bad it was. It even leaned to one side. So I decided that I just didn't like making cakes and that it was too sloppy for me. I like clean crisp edges and neat lines--easily achieved with paper. Not so much with cake. Goopy, unpredictable and messy. Yup. Always getting the crumbs from the cake into the frosting.
Last year I decided I was going to learn how to make a decent cake for the buddies birthday (below). So I picked the brains of a couple of really great ladies at church, one of whom used to teach cake decorating classes. (yep, I'm too cheap to take an actual class). Here are some the most important things I learned from them.
When making a layered cake: bake the cakes. Let them cool, take them out of the pans, and wrap them tightly in saran wrap. (but not so tight that you crumble the cake :) Then freeze them overnight. It's about 10 times easier to frost a frozen cake than it is to frost a soft crumbly cake. And the best part of all is that when you freeze it, the moisture is kept in the cake and you end up with a much moister cake.
When frosting the cake I also learned that you don't go over and over the same area with the knife. An easy way to do it is to pipe the frosting on all over the cake with a big tip and then just spread it flat so you don't make such a mess.
And finally, I really like using fondant: crisp edges and neat lines :) I made my own marshmallow fondant, which is kind of annoying, but really much yummier than the already made kind. I used this recipe from all recipes. When you are ready to use it just roll it out with some powdered sugar to keep it from getting sticky and then use cookie cutters or fondant cutters (or new sculpey clay cutters) to cut them out. Get them wet with a tiny bit of water and stick them on your cake.
Anyway. This week I'm going to attempt to make a chocolate ganache for a fancy chocolate cake I'm making for a mother's day tea party. It's amazing how much more confident I feel with a few cake making success behind me. I'm no pro and I've still got a lot to learn, but I've decided that making cakes is surprisingly fun, time consuming, but with some attention to detail do-able.
Tuesday, May 17, 2011
the party is over and a couple of free printables . . .
Well, the buddy's birthday is done. It was fun to plan and the party itself turned out great. All week the buddy kept telling me as he helped me make stuff "this is going to be the best party ever!" And that is why I love being a mom. He is so sweet and he was so happy.
Favor Boxes: I used a pattern from the only craft book I've got: Home Paper Scissors by Patricia Zapata, which I already blogged about.
Inside: I made these fun little notebooks to go inside-they usually use a paint chip for the outside (google paint chip notebooks for a plethora of tutorials). A simple label wrapped around the outside finished it off. Threw in suckers, crayons, green army men, and fruit snacks to round it out.
GET A PRINTABLE OF THE THANKS SPACESHIP LABEL HERE
GET A PRINTABLE OF THE NOTEBOOK LABEL HERE.
A couple games:
"The Claw": a simple magnetic fishing pole to pull out a space ranger badge (I mounted them on green craft foam and hot glued a pin on the back.
GET A PRINTABLE OF THE BADGE HERE.
Star Command Wings: decorated wings made of spray painted cardboard with adhesive foam and crayons.
"Woody's Round Up": a cake walk with printable coloring pages colored by the buddy and I. (Yeah, my kitchen floor is the only hard floor in the house-lovely vinyl I know).
The cake: The buddy picked a picture off the internet and I attempted to re-create it. Considering it was my first tiered cake, and my first time working with fondant, I think it turned out rather well. I used this marshmallow fondant recipe, and spent a good 8 hours making it from start to finish.
********* intended freebie friday: **********
This wasn't for his party, but for his dinner that night- a special birthday plate. I plan on making it a tradition-on your birthday you get to use the special "birthday plate." It was suppose to be the freebie on Friday, but with blogger down I never got it up. After messing up the first attempt I realized that for it to work it's really important to spray it with an aerosol hairspray to keep the ink from running. Then use a thin layer of modge podge between the plate and the print, and SEVERAL layers over the back. Then try your best to not get too much water on the back when you wash it.
GET THE PRINTABLE HERE.
Subscribe to:
Posts (Atom)


