Tuesday, January 31, 2012

In the shop: Animal Shaped Alphabet Toppers


I've just posted these fun Animal shaped alphabet circles


The idea of these toppers was to make my ABC posters a little more accessible, and useable. They are fun on a wall, but I want to use them in more ways. 

The possibilities of these circular little ABC's created by animal bodies are pretty vast. Here are some ideas:

Obviously you can use them as cupcake toppers
How about as a card embellishments
A small gift tag
A monogrammed seal for kids gifts, favor bags, etc . . .
Make a mini word banner for the top of a cake or a small space
Turn into stickers
Make into a matching game
Make into badges or a knecklace


Anyway, pretty fun. Find them here


Monday, January 30, 2012

weekend prep


This may be a little, or a lot, random and completely not on topic, but it is what I did this weekend. We put 1700 lbs of hard white wheat into 6 gallon food grade buckets with lots of oxygen packs to take out all the air. We, being me, my mom, the hunny, and my bro. It only took us about an hour to fill 34 buckets.  


And why, you ask, in the heck were we doing that? Well, for lots of reasons. My mom found a great deal on wheat, say $20 for 50 lbs. And we're both trying to add more whole wheat to our diet. But, these weren't just for my mom and I and that's only part of why we were doing it. We were also doing it to be prepared. Food Storage you know. Not because I'm a conspiracy theorist or because I think 2012 is going to be the end of the world, but because you never know what might happen-not just with the world but with us. What if the hunny lost his job? It sure would be nice to have a little back up food around until we got back on our feet. Anyway, so the buckets got divided out 6 ways and I'm happy to have a little extra wheat on hand :) Random, yes. Reassuring too :)

Tuesday, January 24, 2012

Starting


I guess my whining last week paid off. After venting a bit on Friday I kicked myself back into gear. First gear. But Saturday I went to Joann's and bought myself some fabric, and this is what I've accomplished so far: All the squares cut out for the buddies quilt. I'm anxious to see the final results! But I dare say venting is therapeutic!


We colored a set of Birthday Masks for fun the other day as well . . . they work great . . . maybe not great enough to hide my lack of make up though, eh?

Friday, January 20, 2012

Freebie Friday: Super Mask Birthday Card


I guess January is always kind of an unproductive month for me. December is so crazy I think I just kind of ooze into a blissful indifference to getting much done in January. The first week or so I'm still running off the steam of Christmas and the hope of New Year's resolutions. But after that it just kind of peters out. And that is where I am. I have lots of great ideas floating around in my head. Like starting a quilt like this but expanding it to a twin size, and using this technique to make it faster. I want to start drawing again since painting seems to be too time consuming for this time of my life, and then I've got a paper mache lamp/ light fixture with Christmas lights as the "bulb" floating around in my head . . . and then a gazillion design projects including some Valentine's ones that may or may not get done before that holiday hits. But, instead I sat around reading Parenting and Time Magazine this afternoon for a good hour or so while the buddy watched TV and the sweetie played dolls and tried to figure out how lego's work (don't worry she's past the eating them phase).


Anywhoo. . . I did make a boy version of the printable Birthday cards as a Freebie Friday for you today though: (Actually I made them over a week ago because I had a nephew's birthday come up, but that's beside the point, right).

Click here to download the Super Mask Birthday Card

Each page makes two birthday cards with instructions for the birthday boy to cut out and color the mask themselves. I recommend printing on white cardstock so they can color it however they choose!


Enjoy!

Wednesday, January 11, 2012

Brown Bag Wreath


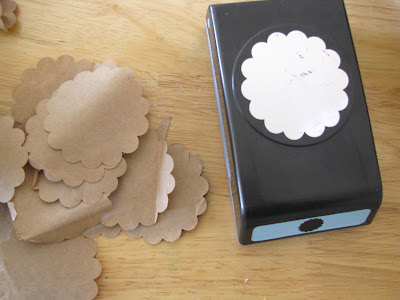
This awesome wreath I was first introduced to on Make Happy. I saw it and knew I needed to make it. But that was over a year ago. I even bought an 1.25 inch scalloped hole punch specifically for this (it's come in handy for lots of other things). But when I took down my Christmas wreath our poor little door looked so bare. I knew the brown paper bag wreath had finally moved up on the priority list. It was time to make it.


I started with a pretty thick brown bag and then moved to what else I had on hand-lunch bags. After starting to put them on the wreath I realized that they weren't quite the same color of brown. So I tried to vary them both through the whole thing to add a little depth. Anyway, a little picture tutorial below. Or you can go to the original in depth tutorial by MaryJanes and Galoshes.


Have a great Wednesday!!

Friday, January 6, 2012

Freebie Friday: Birthday Crown Card


When I was a girl I had one uncle who sent me birthday cards. Not every year, but often enough that I felt that he cared. I felt special and important to someone I didn't see very often and it meant a lot.


So as an aunt (and sister and in law), I've tried to do the same thing: remember family birthdays with cards. It's a big job. The hunny and I both come from large families. We're rounding out to about 60 cards a year. This year I've decided to make it a little bit more fun for the nieces and nephews and a little faster for me too.


The birthday crown card is going to all my nieces this year. In the past I've always made them a personalized card, but I think this will be more fun for them, still it's a card with a personalized note from us inside, but they can cut it up and turn it into a birthday crown to decorate and wear!


I thought it would be fun to share: click here for the Birthday Crown Card. 


 A letter size sheet makes 2 cards. I recommend printing on colored cardstock, and then cutting in half longwise. (along the dotted line).

When they cut out the crown they will use the bottom strip to go around the back of their head, and tape it to fit. Instructions are included on the card!


ENJOY!


** I'm also sorry about the poor pictures. My camera batteries died during the photo shoot, and  I'd forgotten to charge the back up set. So these are mostly thanks to my phone. Alas.

LinkWithin

Related Posts with Thumbnails